I was messing around in Photoshop and I thought I'd share this trick with you guys.
Tutorial for creating a cool ripple design in Adobe Photoshop:
Step One: Create a new document, 1000x1000 pixels, 300 resolution.
Step Two: Select white as a primary color, black as secondary. Apply Clouds (Filter > Render > Clouds).
Step Three: Apply Twirl (Filter > Distort > Twirl) with an angle set to 180.
Step 4: Apply ZigZag (Filter > Distort > ZigZag) with amount set to 70, ridges set to 8, and style set to pond ripples.
Step 5: Create a new layer from the background (Layer > New Layer > New Layer From Background) named "Ripple".
Step 6: Go to Edit > Transform > Perspective and move the bottom corners out until you get an angle you like. Hit enter.
Step 7: Go to Image > Adjustments > Hue/Saturation. Apply Colorize. Set Hue to a color you like (180-220 work best). Set Saturation to a value you like. The further away from 200 your hue is, the lower your saturation should be. 50 works well at 200. Keep lightness at zero, or tweak it to your liking. Hit enter.
(steps 8-12 are optional)
Step 8: Command-click on "Ripple" in the layers palette. Hit command-C. Create a new layer via copy (command-J). Rename it (Layer > Layer Properties) "Ripple 2."
Step 9: Select the Sponge tool (control-click on the dodge/burn/sponge tool icon). Open the brush palette and select one of the first six brushes. Change the brush size to around 200 pixels. Set the mode to desaturate and the flow to %100. Sponge over the entire Ripple 2 layer one time (don't lift your pen).
Step 10: Go to Layer > Layer Style > Blending Options. Go to the first of the two bars at the bottom of the screen and move the black marker towards the right until you get something you are happy with (any desaturated part will become a highlight). 100-150 usually works, but it's pretty variable.
Step 11: Change the blend mode to something you like. You can also go back and monkey with the blended shades some more after you make your selection. Don't worry if the edges are rough, you can fix it.
Step 12: Apply a Gaussian Blur (Filter > Blur > Gaussian Blur) with a radius of 3 pixels.
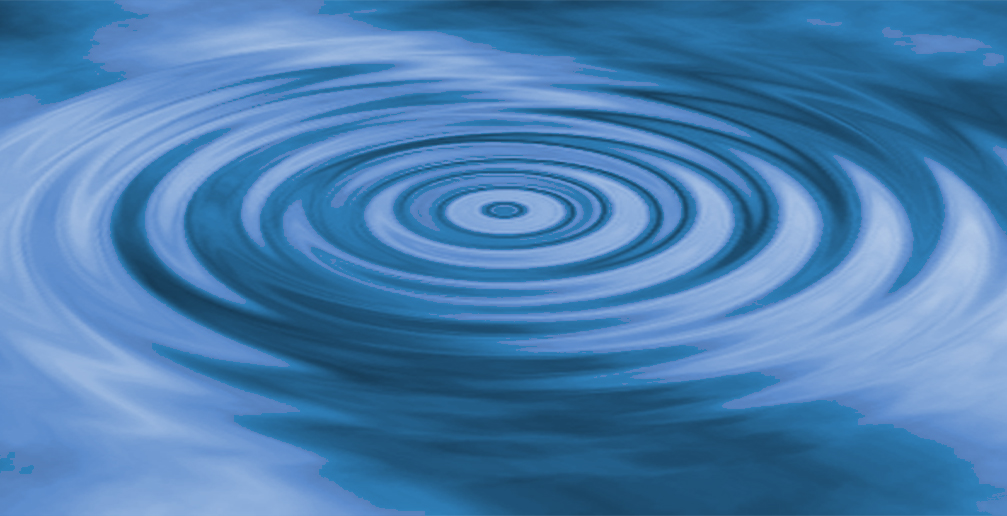
That is my attempt to follow this tutorial. It was not all that bad, but keep in mind that command is not an option when using a PC(instead there is ctrl) but overall a fairly nice tutorial.
I repeated the process following my own tutorial, and I got something much more similar to yours. I Think I rescaled it at some point in the example I put up, I just can remember when. I think I might have increased the document size, since that would explain the crappy quality. Anyway, here's a better example of what the end result should be.
Now I'mma gonna have to try this. It'll actually be something worth doing, unlike me just taking the 'Fix Spot' tool and filling in random areas of pictures. It can get kinda creepy when done on a face. XD