The Making Of: Dark Cut 3
Dark Cut 3 is finally out, but I wanted to take some time to talk about what went into making this surgery simulator game.
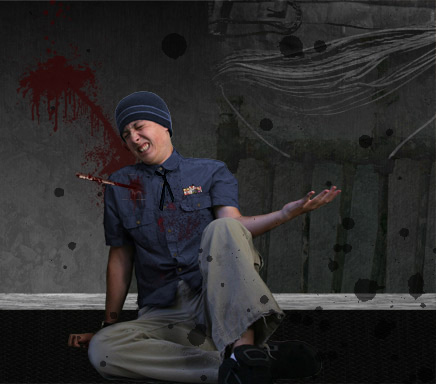
First let’s talk about graphics. The game’s subjects are usually pictures of myself using several different angled pictures. I then doctor them to the point that they are relevant to the time period and subject. For example, the picture above is the picture of me on the submarine with a metal pipe through my shoulder.
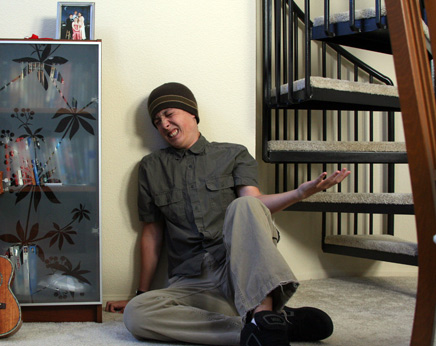
- I first take the base image:

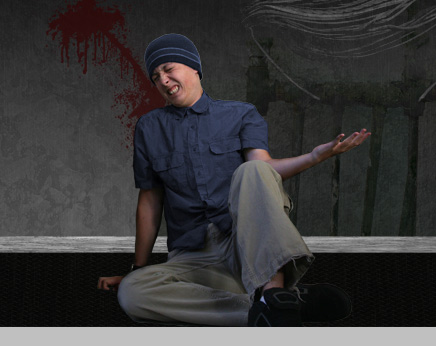
- I then crop out my entire body very carefully and make sure I remove a lot of the excess junk in the background. While I am at it, I change the hue of my shirt to be a bit more naval.

- After this long and arduous process I move into creating a background and floor. I do this by finding textures of these (free textures are available on the web for free) and building that old metal look. I also draw a splat by using a splat stencil and drawing a splattered line by hand down the wall.

- Next I add just a touch of lighting across the entire background. To keep the character in focus I left him (myself) in the brighter light.

- And finally, I add the minor details. Notice the buttons are gold to bring out the colour, and that there is now a large metal object protruding from my shoulder. This is done through drawing by hand around the wound area, and actually finding a piece of red meat from a cow to cut away at on the shirt. Red meat is the best way to create that “exposed arm” look because it provides a really nice texture and colour variation. So yes, in every Dark Cut surgery you are looking at raw animal meat where wounds are located.

- Now that the image is done, we’re not quite done yet. We have to recreate every step of the surgery as an image. For example, the before and after of a stitched area of skin, or the before and after of a poll being removed. This accounts for about 22-30 images per surgery, and careful planning must be made to ensure that continuity works.
- After the art is all done, I have to make different splatters and textures for blood that hit the screen. This is done using a combination of Photoshop filters, blends, and brushes. Here is an example of one:

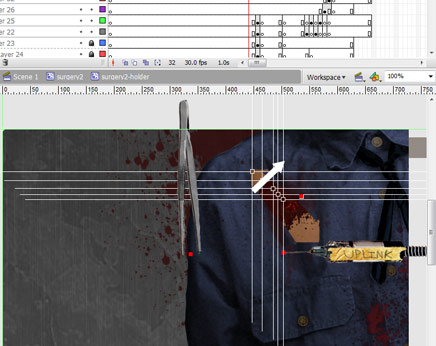
- After I cut out the tools and other goods, I import all the art assets into Flash. I think assemble each of the tasks into groups, and code away at making tools function against the artwork.

The artwork complete, the coding complete, the surgery is done. Now for Dark Cut 3 I had 5 major surgeries and 3 mini surgeries (called treatments), which meant this process was repeated several times. It takes about a week to complete a surgery from camera to Flash.
My composer, MaestroRage, is instructed before all this process takes place to compose tracks for this game. For Dark Cut 3 he composed several beautiful tracks based on the theme of each surgery and the content.
Around all the surgeries there are additional tasks at hand. Making the menus, preloaders, buttons, finding sound effects, and working with a musician is a lot of work and getting it all to come together within a couple of months is quite a lot of work. But once it’s all put together it’s a photo-realistic experence and it’s (hopefully) a lot of fun!

